


Introduction
When you’re finishing drywall, choosing between dry Sanding and wet sanding drywall can make all the difference in your project’s outcome. Each method has its own set of tools, benefits, and ideal use cases. Dry Sanding is known for delivering a smooth, professional-grade finish, especially on large installations; however, it creates a fine dust that requires extensive cleanup and the use of protective gear.
Wet Sanding, on the other hand, uses a damp sponge to soften joint compound and is praised for its low dust output, making it ideal for small spaces and occupied homes. Reddit communities are full of real-world experiences and DIY tricks that have helped countless individuals navigate this decision.
In this comprehensive guide, we’ll break down the key differences between dry and wet sanding drywall, explore insights from Reddit, share expert sponge techniques, and highlight the pros and cons of each approach so you can avoid common mistakes and achieve flawless, paint-ready walls.
Comparison Table: Dry Sanding vs Wet Sanding Drywall
| Feature | Dry Sanding | Wet Sanding |
| Tools Required | Sandpaper, sanding sponge, pole sander | Large damp sponge, spray bottle, water bucket |
| Dust Level | High–fine dust spreads easily | Minimal low dust, easier cleanup |
| Finish Quality | Smooth, polished, professional finish | Softer, less polished, may require touch-ups |
| Ideal Use | Large-scale drywall installations, final coats | Small repairs, early coats, and dust-sensitive areas |
| Surface Suitability | All drywall surfaces | Only suitable for drying/partially dry compound |
| Dry Time Impact | No impact | May slow drying slightly due to added moisture |
| Noise Level | Moderate | Quiet – ideal for night work or noise-sensitive environments |
| Cleanup | Requires vacuuming, wiping, and dust sealing | Quick and easy cleanup – just wring and rinse the sponge |
| Protective Gear Needed | Yes – respirator, goggles, and drop cloths are essential | No – typically safe without gear |
| Skill Level Required | Moderate to advanced | Beginner-friendly |
| Sponge Tricks (Wet Sanding) | N/A | Use a soft sponge, wring out water, two-pass method, flip often, use light pressure |
| Reddit Feedback | Effective but messy; best for smooth finishes | Cleaner, slower, great for early coats and occupied spaces |
| Common Mistakes | Over-sanding, not sealing the room, and inhaling dust | Using the wrong sponge, over-wetting, sanding too early, or hard |
| Recommended Hybrid Use | Final coat sanding | Early coats, blending seams, touch-ups |
| Finish Inspection | Required with light to catch imperfections | Same – use a shop light or side lighting to check the surface |
| When to Use | When the room is empty or under renovation, a perfect finish is needed | When space is occupied, dust control is essential, or doing minor repairs |
Understanding Dry Sanding vs Wet Sanding Drywall
Before diving into techniques and community feedback, it’s essential to understand what each method involves.
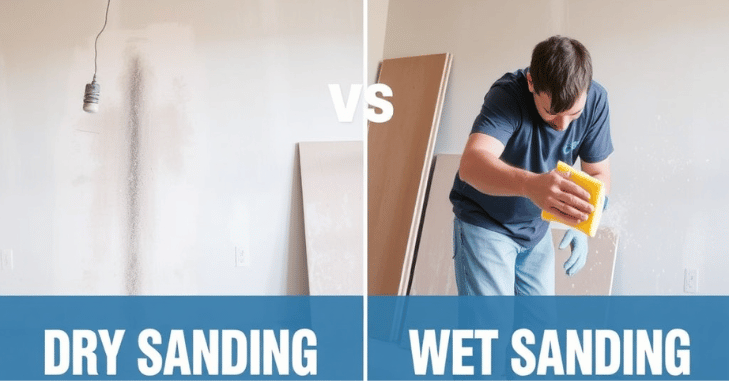
- Dry Sanding involves using traditional sandpaper or sanding sponges to smooth out dried joint compound (also known as “mud”). It produces fine dust and is commonly used by professionals for a polished, paint-ready finish.
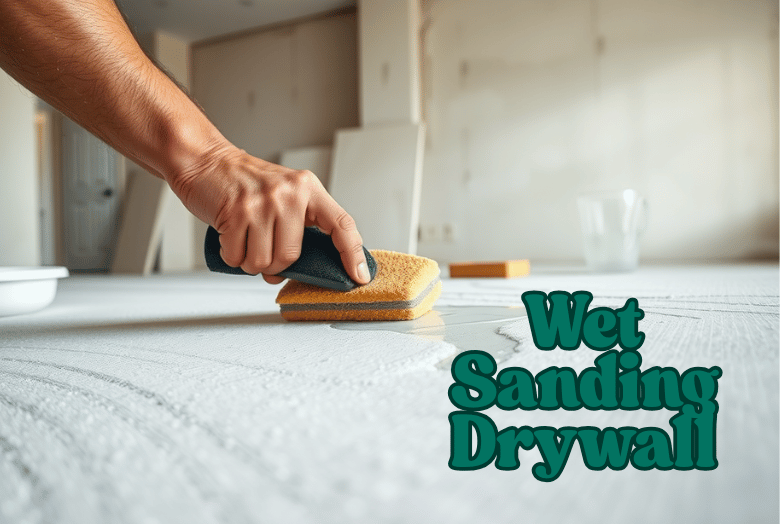
- Wet Sanding, on the other hand, uses a damp sponge or cloth to soften and smooth the mud while it’s still drying or partially dry. This method produces less dust, making it appealing for indoor renovations and smaller jobs.
Table: Key Differences Between Dry Sanding and Wet Sanding
| Feature | Dry Sanding | Wet Sanding |
| Tools Required | Sandpaper, pole sander, sanding sponge | Damp sponge or cloth |
| Dust Level | High – requires masking and vacuum | Minimal – easier cleanup |
| Finish Quality | Smooth, professional-grade | Softer finish – may need touch-ups |
| Best For | Large projects, final smooth coat | Small areas, touch-ups, early layers |
| Surface Suitability | All surfaces | Only suitable for drying compound |
| Reddit Feedback | Effective but messy | Cleaner but slower |
| Dry Time Impact | No impact | May slow drying slightly |
| Skill Level Required | Moderate to high | Beginner-friendly |
| Noise Level | Moderate | Low (nearly silent) |
Sponge Tricks for Wet Sanding Drywall

Wet sanding drywall with a sponge is a technique that requires patience, but when done right, it can save hours of post-job cleanup. Here are some sponge tricks, straight from Reddit threads and experienced contractors:
1. Use a Soft, Absorbent Sponge
Reddit users recommend using a large, soft cellulose sponge, the kind used for washing cars or grouting tile. These are absorbent and flexible, making them perfect for contouring to corners and seams.
2. Wring Out Excess Water
Never use a dripping sponge. A Redditor pointed out that “too much water = gouged mud and longer dry time.” Instead, wring the sponge until it’s just damp before use.
3. Two-Pass System
Reddit’s DIY community swears by the two-pass method:
- First pass: Use a circular motion to soften ridges and blend seams.
- Second pass: Use long, smooth strokes to polish the area.
4. Flip Sides Often
One pro tip shared is to “flip your sponge frequently.” A dirty or overly saturated sponge can reapply mud back onto the wall, ruining your finish.
5. Use Light Pressure
Let the moisture do the work. Pressing too hard can damage the compound and expose the tape.
Reddit Insights: What the DIY Community Says
Reddit is full of real-world experiences, cautionary tales, and debate over sanding methods. Here are the most common insights:
Dry Sanding Opinions
- “Dry sanding gets you a flawless finish, but it’s a nightmare in a lived-in home.”
- “Invest in a vacuum sander, your lungs will thank you.”
- “Always wear a mask and seal the area. That dust gets everywhere!”
Wet Sanding Opinions
- “Wet sanding is a game-changer if you’re working in an apartment or around kids.”
- “It takes longer but saves a ton of cleanup time.”
- “Perfect for early coats and spot repairs, but don’t expect it to match dry sanding’s finish.”
Hybrid Method Praise
Interestingly, many users combine both techniques:
- “Start with wet sanding for layers 1 and 2, finish with dry sanding for the final coat.”
Pros and Cons of Dry Sanding Drywall

Pros
Dry Sanding delivers a superior finish for a smooth, professional look, remains reliable for large projects such as full‑room drywall installations or new constructions, and allows for easy shaping that’s perfect for detailed feathering of seams.
Cons
Dry Sanding creates a dust storm, producing fine particles that can linger in the air and potentially damage electronics or HVAC systems. Because of this, protective gear such as respirators, goggles, and drop cloths is essential to ensure safety and cleanliness. Additionally, this method requires considerable cleanup after sanding, often adding extra time and effort before you can move on to priming or painting.
Pros and Cons of Wet Sanding Drywall

Pros:
- Low Dust: Great for homes with children, pets, or minimal ventilation.
- Quiet Operation: Perfect for nighttime or noise-sensitive settings.
- Beginner-Friendly: Less risk of over-sanding or damaging drywall tape.
Cons:
- Longer Dry Time: Moisture can slow the curing of the compound.
- Not as Smooth: May leave a slight texture that shows under paint.
- Limited to Certain Phases: Less effective on the final coat, where a smooth finish is essential.
When to Use Dry vs Wet Sanding
Choose Dry Sanding When
Dry Sanding is the preferred choice when you’re working on a large-scale drywall installation and need a perfectly smooth finish. It’s especially effective if you have access to dust extraction equipment, such as a vacuum sander, and are working in an environment that’s either empty or currently under renovation, where dust and disruption are minimal.
Choose Wet Sanding When
- Doing minor repairs or patch jobs.
- Working in an occupied or furnished space.
- Dust control is a priority.
- You’re sanding early coats of joint compound.
What to Avoid: Common Mistakes
1. Using the Wrong Sponge
Not all sponges are created equal. Avoid rough kitchen scrubbers or overly stiff sponges, as they can gouge or flake the drywall.
2. Not Letting the Compound Dry Enough
Wet Sanding works best when the mud is partially dry, soft, but not wet. Rushing the process can lead to tearing and poor bonding.
3. Over-Sanding
Whether wet or dry, sanding too aggressively can expose the drywall tape or leave gouges. Always use light, consistent strokes.
4. Cross-Contamination
Don’t dip a dirty sponge into clean water. Use two buckets: one for rinsing, one for fresh water.
5. Skipping a Final Inspection
Reddit DIYers recommend using a shop light or side lighting to spot imperfections before priming. Even minor flaws will be magnified after painting.
Safety Tips for Both Methods
- Ventilate the Area: Even with wet Sanding, moisture buildup can create mildew if not ventilated.
- Wear a Mask: Especially for dry Sanding, drywall dust contains fine particulates that can irritate lungs.
- Use drop cloths to protect floors and furniture from drips or dust.
- Keep Children & Pets Away: Drywall dust can be harmful to sensitive respiratory systems.
Recommended Tools and Supplies
| Purpose | Wet Sanding Tools | Dry Sanding Tools |
| Main Tool | Large cellulose sponge | Sandpaper (120–220 grit), sanding pole |
| Extra Protection | N/A (just water) | Dust mask, goggles, vacuum sander |
| Surface Prep | Spray bottle or water bucket | Tack cloth for dust removal |
| Lighting | Portable work light for wall inspection | Same as wet Sanding |
| Touch-Ups | Corner sponge or sanding sponge | Hand-sanding block |
Final Verdict: Which One Is Better?
There’s no one-size-fits-all answer. Dry Sanding excels in performance and polish, while wet Sanding wins in convenience and cleanliness. Many professionals recommend a hybrid approach: use wet Sanding for the early coats and detail work, then switch to dry Sanding for the final pass.
If you’re a homeowner doing minor drywall repairs or are sensitive to dust, wet Sanding with a sponge could be the perfect solution. If you’re aiming for a flawless, showroom-ready finish and are willing to deal with cleanup, dry Sanding is the better choice.
Conclusion
In the debate between using and not using wet Sanding for drywall, the best method ultimately depends on your project’s size, desired finish, environment, and personal preference. Dry Sanding remains the go-to choice for professionals seeking a smooth, polished finish on large drywall installations. Still, it requires protective gear, dust control, and a significant amount of cleanup.
On the other hand, wet Sanding with a sponge is praised for being beginner-friendly, quiet, and low-dust, making it ideal for minor touch-ups, early coats, or work in occupied or dust-sensitive spaces. Thanks to Reddit insights and sponge tricks like the two-pass method, using light pressure, and flipping the sponge frequently, wet Sanding has become a trusted technique for DIYers looking to minimize mess.
Many experts recommend a hybrid approach: wet Sanding for early layers and dry Sanding for the final coat. By understanding the tools, pros, cons, best use cases, and common mistakes for each method, you can confidently choose the approach that yields professional-looking, paint-ready drywall with fewer headaches.
Want to know about “Common DIY Renovation Mistakes and Why to Let the Professionals Do It” Check out our “Home improvement” category.
FAQs
You can reduce your dust output to nearly zero using a wet-sanding method. This process is far from precise. It doesn’t leave you a perfectly smooth surface and is much slower than traditional Sanding. But it’s one of the best ways to prevent dust from taking over the space.
High-Quality Finish Requirements: Wet Sanding is often used when a very smooth finish, such as that required in auto body work or on high-end furniture, is needed. The water used in wet Sanding helps to minimize scratch marks, providing a finer finish than dry Sanding.
The main limitations are controlling the water feed and containment (for power systems), and it does not work well for hydroscopic (absorbent) materials such as wood.
The process of wet Sanding involves sanding the area with dampened sandpaper to create an even surface, allowing the existing paint to bleed into any gaps.
Wet Sanding is a technique that can be used to create a buttery smooth finish on painted surfaces, unlike anything else.
